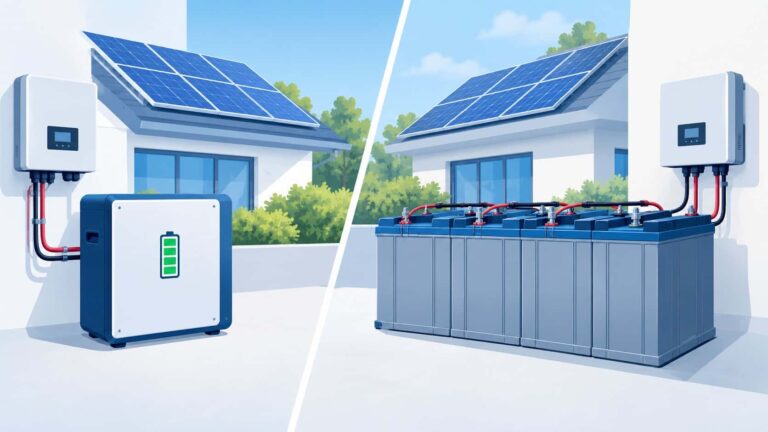

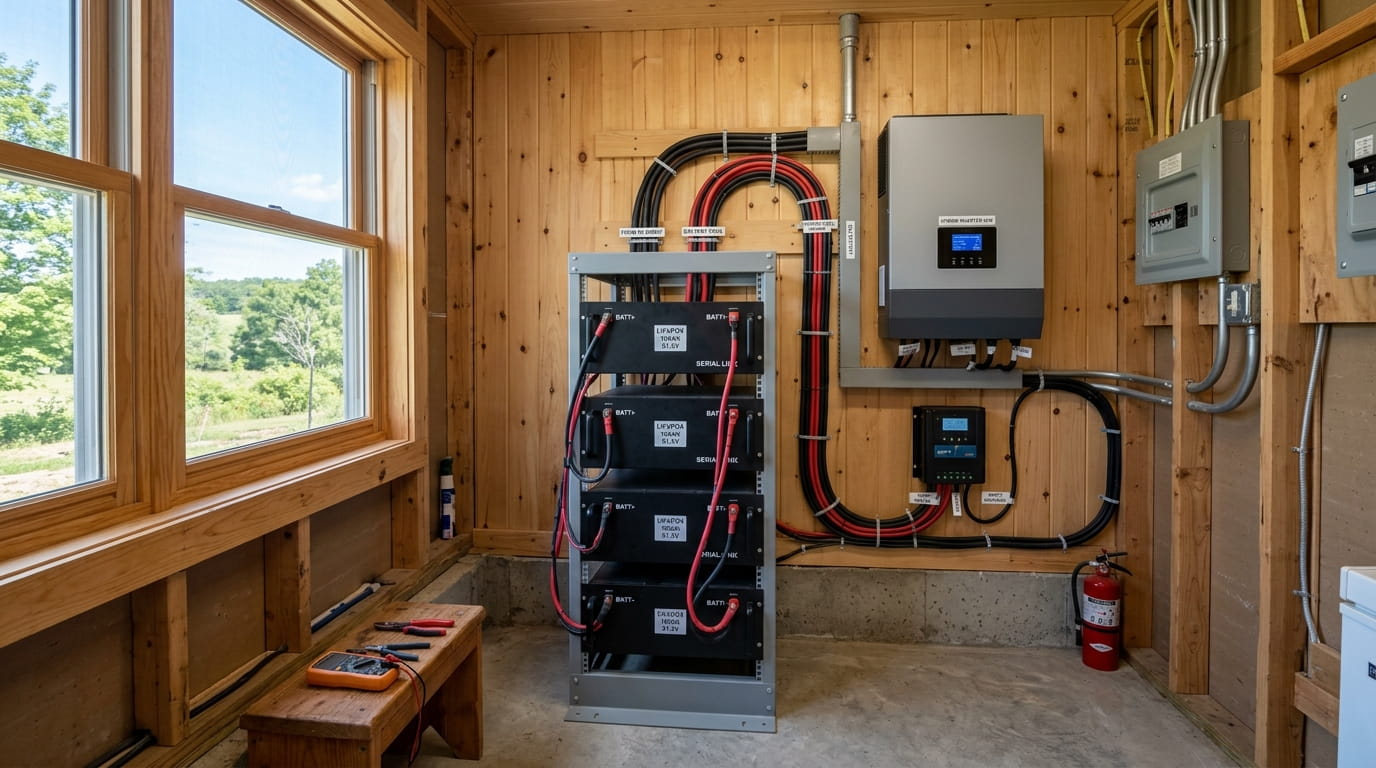
Battery Bank Sizing Formula for Off-Grid Solar Systems: 2026 Guide
Who this is for: This guide is for homeowners, installers, and system planners who need a transparent first-pass battery-capacity calculation before selecting equipment.
Consider a common sizing mistake: multiplying daily watt-hours by autonomy days and treating the result as the battery’s nameplate capacity. That skips usable depth of discharge and can leave the bank undersized. Cold temperatures, conversion losses, discharge rate, battery age, and manufacturer limits can also change the amount of energy you can actually use.
This guide walks through the battery bank sizing formula in a practical order, with a worked example and the assumptions that can change the answer. It covers daily energy, autonomy, usable depth of discharge, system voltage, physical battery configuration, temperature, and the limits of a simple formula.
The Core Battery Bank Sizing Formula
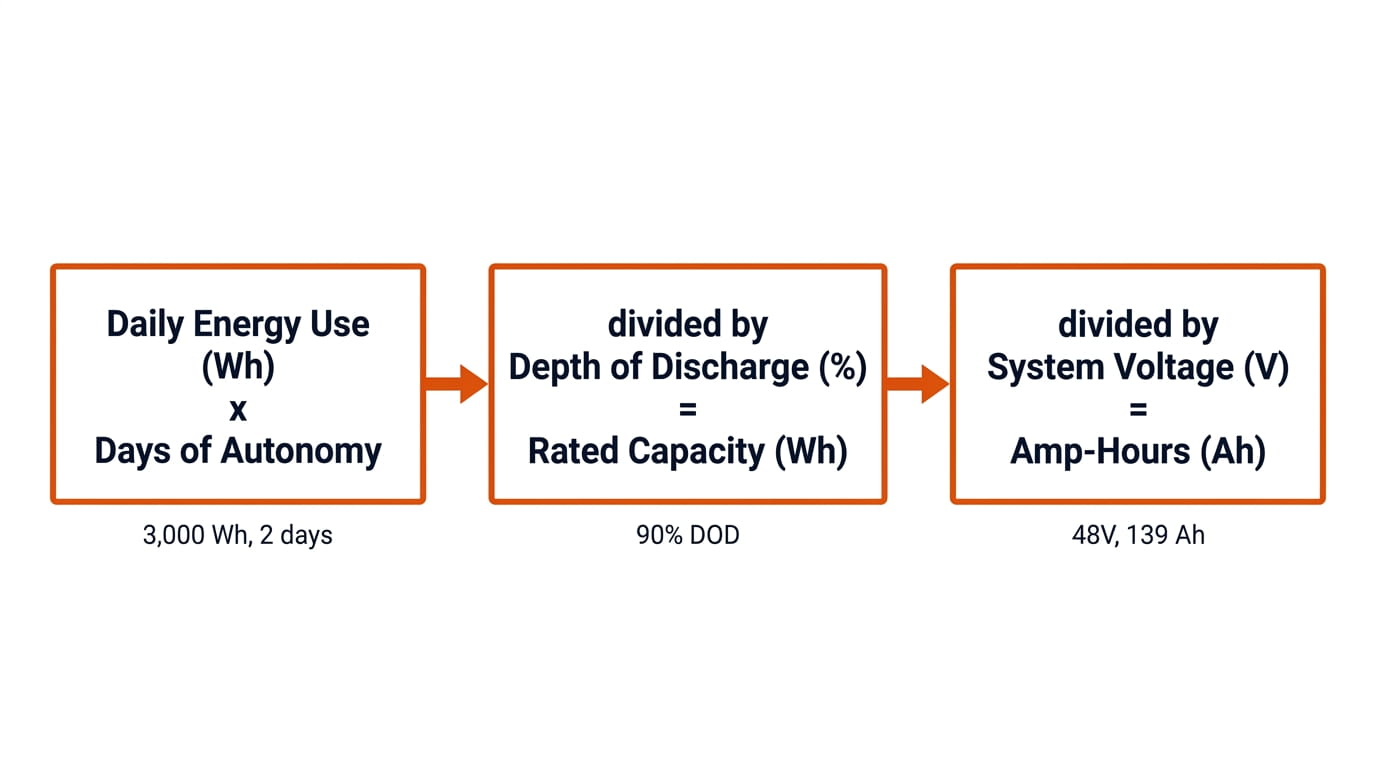
Three inputs drive the core calculation: daily energy demand, required autonomy, and the usable fraction of the battery. System voltage is used afterward to convert the required watt-hours into amp-hours.
- Energy needed = Daily Energy Use (Wh) x Days of Autonomy
- Nominal battery capacity = Energy Needed divided by usable Depth of Discharge (decimal)
- Amp-hours = Rated Capacity (Wh) divided by System Voltage (V)
Run a number through it. A homeowner uses 3,000 Wh per day, wants 2 days of autonomy, and runs a 48V LiFePO4 bank at 90% DOD:
Energy needed = 3,000 x 2 = 6,000 Wh
Rated capacity = 6,000 divided by 0.90 = 6,667 Wh
Battery capacity = 6,667 divided by 48 = 139 Ah
The planning result is therefore about 6.67 kWh nominal capacity, or 139 Ah at 48V. The actual battery selected should be the next suitable manufacturer-rated size after checking continuous power, surge requirements, BMS limits, temperature, wiring, and installation constraints.
Step 1: Calculate Daily Energy Consumption
Nameplate wattage lies. A refrigerator rated at 200W might average 90W once the compressor cycles on and off through the day. The only way to get a real number is a load worksheet.
| Appliance | Quantity | Power (W) | Hours/day | Daily Wh |
|---|---|---|---|---|
| LED lights | 5 | 10 | 6 | 300 |
| Refrigerator (running avg.) | 1 | 150 | 8 | 1,200 |
| Laptop | 1 | 65 | 4 | 260 |
| Water pump | 1 | 250 | 1 | 250 |
| Water heater | 1 | 2,500 | 0.5 | 1,250 |
| Total | 3,260 Wh/day |
Add the system loss buffer
For a simple planning worksheet, you can apply a provisional system-loss allowance. Here we use 12% only to keep the worked example consistent: Adjusted Daily Use = Total Wh x 1.12. In this example, 3,260 x 1.12 = 3,651 Wh/day. For a real installation, replace this blanket allowance with measured or manufacturer data for inverter efficiency, wiring, conversion stages, standby consumption, and other system losses.
Step 2: Define Days of Autonomy
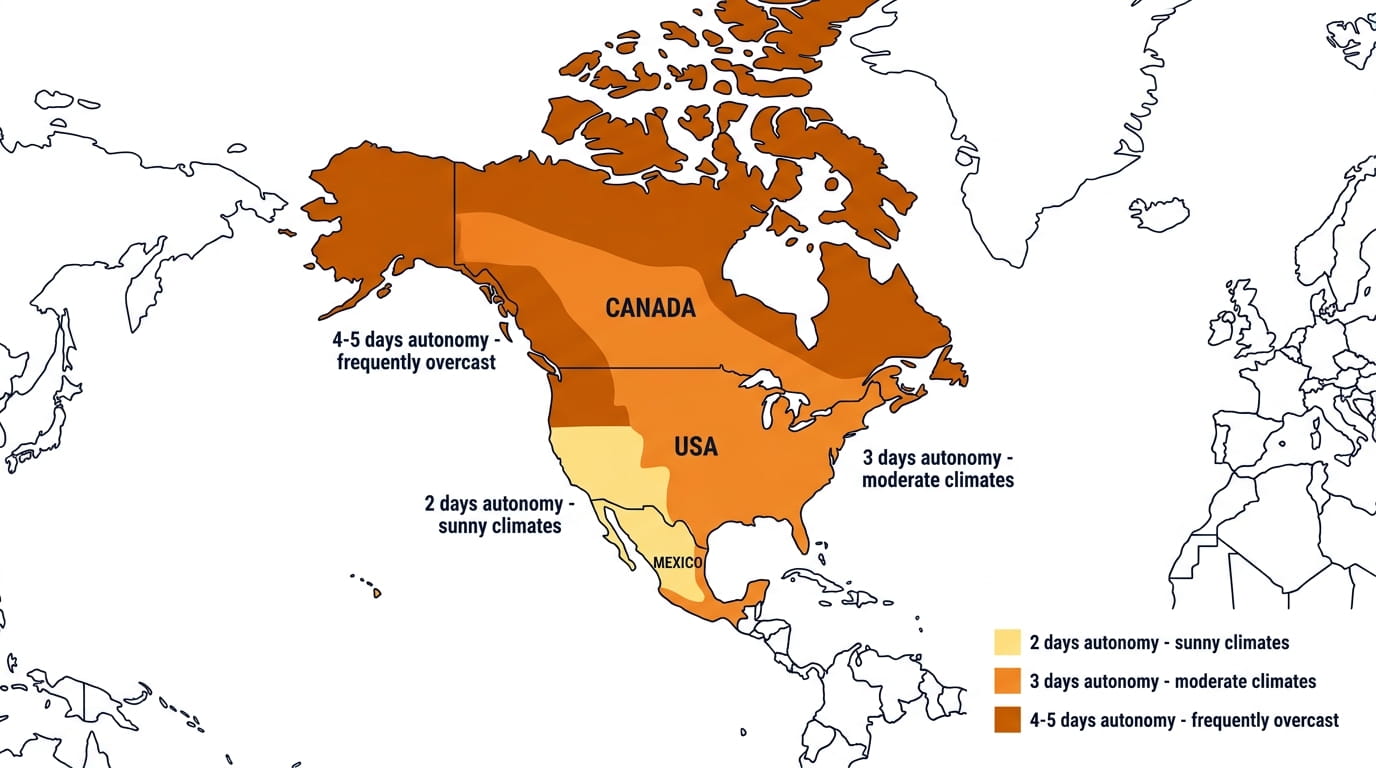
Use site-specific solar and weather data rather than selecting an autonomy value from a generic climate label. NLR publishes monthly and annual solar-resource data, including the National Solar Radiation Database, that can be used to understand seasonal variation.
| Design question | Effect on autonomy |
|---|---|
| How often can prolonged low-solar periods occur? | More frequent or longer low-solar periods generally justify more stored energy or another backup source. |
| How critical is the load? | Critical loads may justify a larger reliability margin than discretionary loads. |
| Is a generator or grid backup available? | Reliable backup can reduce the amount of battery capacity required for rare extended outages. |
| Does the load change seasonally? | Check the worst relevant season rather than using one annual average. |
Seasonal solar availability can vary substantially by location. Use monthly solar-resource data for the actual site instead of assuming winter is always the limiting period. If the load also changes seasonally, evaluate both sides of the equation together.
Each additional autonomy day increases required battery energy in direct proportion to the load. Whether additional storage or a backup generator is more economical depends on equipment prices, fuel, maintenance, operating frequency, and the reliability target; there is no universal cost crossover.
Step 3: Account for Depth of Discharge
For example, if a design deliberately limits a 200Ah battery to 50% DOD, the planning allowance is 100Ah of usable capacity. If another battery is specified for 90% usable DOD, the corresponding planning allowance is 180Ah. These are calculation assumptions, not universal chemistry limits; manufacturer specifications and warranty terms take priority.
| Item | LiFePO4 | Lead-acid |
|---|---|---|
| Usable DOD | Often higher, but model-specific | Often lower for long service life |
| Cycle life | Highly dependent on DOD, temperature, C-rate and cell design | Highly dependent on DOD, temperature, charging and battery design |
| Maintenance | Usually low for a properly integrated BMS-based pack | Depends on flooded, AGM, gel or other construction |
| Best sizing input | Manufacturer’s usable energy, DOD and warranty data | Manufacturer’s usable energy, DOD and warranty data |
Real numbers, side by side
Using the 3,651 Wh/day example with 3 days of autonomy (10,953 Wh needed):
LiFePO4 at 90% DOD: 10,953 divided by 0.90 = 12,170 Wh (about 254 Ah at 48V)
Lead-acid at 50% DOD: 10,953 divided by 0.50 = 21,906 Wh (about 457 Ah at 48V)
Under the assumptions in this example, the lead-acid bank needs about 21.9 kWh nominal capacity versus 12.2 kWh for the 90%-DOD LiFePO4 case. That does not by itself prove which option is cheaper: purchase price, cycle life, maintenance, temperature, replacement interval, and usable-energy warranty all matter.
Step 4: Assemble the Physical Battery Bank
| Voltage | Typical use | Planning note |
|---|---|---|
| 12V | Small loads and compact systems | Higher current becomes a concern as power rises. |
| 24V | Small-to-medium systems | Can reduce current compared with an equivalent 12V design. |
| 48V | Many larger residential/off-grid systems | Lower current at the same power, but every component must support the selected voltage. |
Higher voltage means lower current for the same power, which can simplify conductor sizing and reduce resistive losses. A 3,651 Wh/day energy requirement makes 48V a sensible candidate for many residential designs, but the final choice must follow the inverter and battery architecture rather than a daily-energy threshold alone.
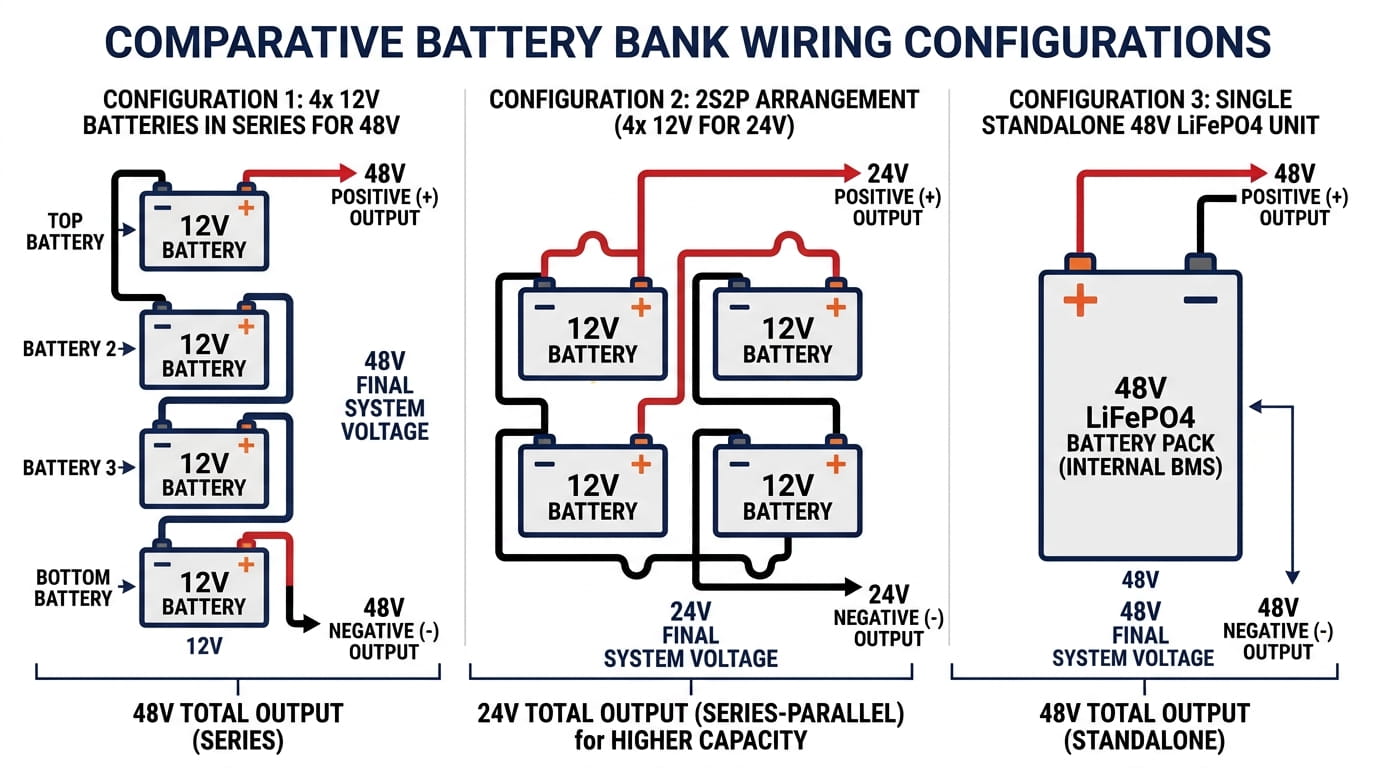
For a 254 Ah requirement at 48V, you have a few configuration options:
- One 48V/256Ah LiFePO4 unit (simplest, largest footprint)
- Four 12V/256Ah batteries wired in series
- Eight 12V/128Ah batteries in a series-parallel configuration for redundancy
Whichever configuration you choose, size the inverter for the required continuous and surge loads. Size the charge controller from the actual PV array voltage/current, controller operating limits, battery charging requirements, ambient temperature, and the manufacturer’s instructions. A single “PV watts ÷ battery volts × 1.25” formula is not sufficient for every controller architecture.
Temperature and Efficiency Losses
| Check | Why it matters |
|---|---|
| Minimum discharge temperature | Available power and capacity can change in cold conditions. |
| Minimum charging temperature | Many lithium systems restrict or stop charging at low temperatures unless heating or other protection is provided. |
| BMS temperature protection | The BMS may limit charge/discharge current or disconnect the pack when limits are reached. |
| Battery enclosure | Outdoor or unheated installations may need thermal management appropriate to the battery manufacturer’s requirements. |
Do not automatically add a fixed 15–20% to every cold-climate battery bank. Instead, use the battery manufacturer’s temperature-performance data and BMS limits. Some lithium systems include heating; others require the installer to provide an appropriate enclosure or thermal solution.
System losses occur at several stages, but the percentages vary by equipment and operating point. NLR’s PVWatts documentation and calculator, for example, treats system losses as multiple categories rather than one universal fixed value. For a final design, use equipment data where available and avoid stacking a generic loss allowance on top of already-included manufacturer efficiency figures.
What This Formula Does Not Calculate
The formula estimates energy capacity. It does not, by itself, prove that a battery can deliver the required power or that the complete system is safe and code-compliant.
- Peak and continuous power: Check the battery and BMS discharge-current limits against inverter and load requirements.
- Inverter compatibility: Confirm nominal voltage, operating range, surge capability, communications, and battery settings.
- Charge capability: Confirm the maximum charging current and the PV/charger operating limits.
- Protection and installation: Follow the battery and inverter installation manuals and applicable electrical/fire codes. NEC Article 706 addresses energy-storage systems, while battery-specific requirements may also apply depending on the installation.
- Temperature: Use the exact battery manufacturer’s charge/discharge temperature limits and BMS behavior.
Battery Sizing Mistakes That Cost Money
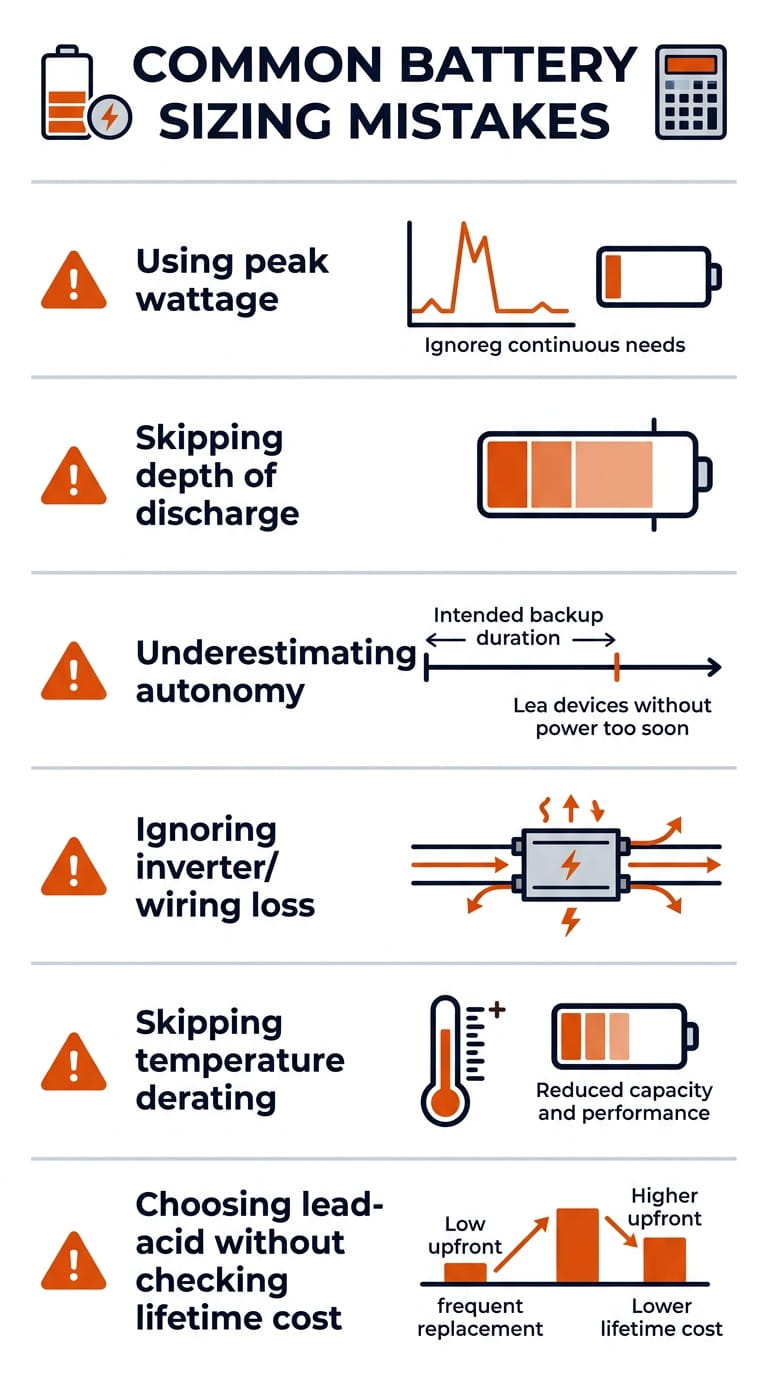
| Mistake | What happens | Fix |
|---|---|---|
| Using nameplate/peak wattage | Misjudges real daily load | Measure running average with a watt meter |
| Skipping DOD | 200Ah lead-acid delivers only 100Ah usable | Divide required Wh by chemistry’s DOD |
| Underestimating autonomy | Bank runs dry during an extended cloudy spell | Match autonomy days to your actual climate |
| Ignoring conversion and standby losses | Usable AC energy is lower than nominal stored DC energy | Use measured or manufacturer efficiency data; a planning allowance can be used only when better data are unavailable |
| Ignoring temperature limits | Battery power, capacity, or charging may be restricted | Follow the battery/BMS temperature specifications and provide thermal management where required |
| Choosing lead-acid without checking lifetime cost | Frequent replacements erase upfront savings | Compare cost per usable kWh over 10 years |
Battery Bank Sizing Cheat Sheet
Keep this next to your worksheet:
- Daily Wh = sum of (Appliance Watts x Hours/Day)
- Adjusted Daily Wh = Daily Wh x 1.12
- Energy Needed = Adjusted Daily Wh x Days of Autonomy
- Rated Capacity (Wh) = Energy Needed divided by DOD (0.90 for LiFePO4, 0.50 for lead-acid)
- Battery Capacity (Ah) = Rated Capacity (Wh) divided by System Voltage
- Number of Batteries = Battery Capacity (Ah) divided by Single Battery Ah Rating
Use a battery sizing calculator to verify these numbers against your exact setup, and a hybrid inverter sizing calculator to match your inverter to the bank you land on.
Frequently Asked Questions
How much battery do I need for a 3,000 Wh/day load with 2 days of autonomy?
Using a 90% usable-DOD planning assumption: 3,000 x 2 divided by 0.90 = 6,667 Wh of nominal capacity, or about 139 Ah at 48V.
Should I choose LiFePO4 or lead-acid for an off-grid system?
LiFePO4 often provides more usable energy per rated kWh and longer cycle life than lead-acid, but the exact result depends on the battery model, operating conditions, warranty, and price. Compare usable kWh and lifecycle cost rather than chemistry alone.
Can I expand my battery bank later?
Possibly, but only when the manufacturer permits expansion and the modules are compatible. Check parallel limits, battery age, firmware, state of charge, communication requirements, and BMS configuration before adding modules.
What if I want more than 3 days of autonomy?
Substitute your required number of days into the formula. Battery capacity rises in direct proportion to autonomy, but whether more storage, more PV, load management, or a generator is the better solution depends on the project.
How do I account for seasonal load changes?
Run the load worksheet for the seasons that materially change consumption. Size for the relevant worst-case combination of load, solar availability, and reliability requirement rather than assuming winter is always the limiting season.
What is depth of discharge and why does it matter for sizing?
Depth of discharge is the percentage of nominal capacity removed during use. The appropriate usable DOD depends on the battery chemistry, model, operating conditions, and manufacturer warranty; use the manufacturer’s specified value for final sizing.
The Bottom Line
The core calculation is simple: energy required divided by usable battery fraction, followed by conversion from watt-hours to amp-hours using system voltage. The difficult part is choosing realistic inputs—actual load, autonomy target, battery specifications, temperature limits, inverter behavior, and installation constraints.
Use the worksheet above as a first-pass estimate, then verify the result with the battery sizing calculator and solar sizing calculator. For an actual installation, also verify the battery, inverter, BMS, protection, conductor sizing, ventilation/thermal requirements, and applicable electrical code.
References
- National Laboratory of the Rockies (NLR), Solar Resource Maps and Data — monthly and annual solar-resource information and NSRDB context.
- NLR, PVWatts Calculator — PV performance estimation and system-loss inputs.
- National Fire Protection Association / NFPA 70, Article 706 energy-storage provisions — energy storage system scope and related standards.
- Battery University, BU-808: How to Prolong Lithium-based Batteries — depth of discharge, temperature, and cycle-life considerations.
- Battery University, BU-201: How does the Lead Acid Battery Work? — lead-acid discharge and cycle-life background.

Nouman Ahmed, a Civil Engineer with practical experience in solar energy system design, engineering calculations, electrical systems, and engineering software development. Since 2011, he has been involved in residential and commercial solar energy projects, helping design practical PV solutions and technical calculation tools.
Nouman is the founder of Solvebility, an engineering resource dedicated to publishing accurate, transparent, and easy-to-use online calculators covering renewable energy, electrical engineering, construction, mathematics, finance, health, and other technical disciplines.